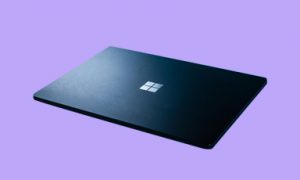
Here is the step-by-step guide to resetting your Microsoft Surface device.
Whether your Microsoft Surface laptop is having some issues or considering selling it, you need to reset your device to its factory settings. In this article, we show you the step-by-step to factory resetting your Microsoft Surface laptop.
Quick Remainder
Before you proceed to factory reset your Microsoft Surface laptop, you need to create a backup of all your files, including documents, photos, videos, passwords, etc., because once you reset the device, all the files will be gone forever. So, to back up your Microsoft Surface laptop, we suggest using a cloud service, like OneDrive, or an external hard drive.
The Benefits Of Performing A Factory Reset Settings
You may notice bogged down or run into errors after using your Microsoft Surface or any other device. Well, factory resetting your device will help your machine back to square one by deleting everything from software, malware, apps, etc. However, this step needs to be made step-by-step because if you miss one step, your device could end up not working. Therefore, you won’t be able to sell it for value.
How to Factory Reset your Microsoft Surface?
Using Windows 10:
- Click on Start Button and select the Cog icon to open the Settings App.
- Select Update & Security
- Then select the Recovery Option, which is on the left side.
- Tap the Get Started button displayed under Reset This PC.
- Select Erase Everything Option because you will sell this device, and you need to remove all the files and folders associated with the device along with applications installed.
- You’ll need to reinstall all drivers and software purchased outside Microsoft Store.
- Select Cloud Download or Local Reinstall.
- View the summary and tap Next.
- Finally, tap on the Reset button to finish.
Note that if you select the Cloud Download, Windows Recovery pulls everything it needs from the Microsoft servers and installs the latest version. However, if you choose the Local Reinstall, Windows Recovery will take what it needs from the local installation. Also, if this option only installs the version you have on the device and not the latest version as the Cloud Download option.
Using Windows Sign-In Screen
Factory reset using Windows Sign-in screen is a second option to rest your device without to actually sign-in. To access the Sign-in screen within Windows 10, press the Windows Logo+ L keys simultaneously.
- Click or tap the Power icon located in the bottom right corner on the sign-in screen.
- Press and hold the Shift Key and then select Restart on the pop-up menu.
- Select Restart Anyway if Windows 10 nags about other users.
- The Microsoft Surface device reboots to the blue Choose an Option screen and select troubleshoot.
- Select Reset This PC.
- From this section, the instructions are the same. Select Keep My Files or Remove everything, and follow the on-screen instructions.
Reinstall your Previous Operating System
If you want to reinstall the previous version of Windows on your Surface:
- Select Start> Settings> Update & Security>Recovery.
- Under Go back to the previous version of Windows 10, select Get Started.
Final Words
To factory reset your Surface laptop is an essential step if you want to sell your device. Not only do you prevent the following user from having access to your data, but your device will be like new. So please, make sure to take time to perform a factory reset; otherwise, you risk losing your data- if you haven’t created a backup- or waste your device if you miss following the steps correctly. If you want to sell your used laptop or other gadgets, we recommend Gadget Salvation for a seamless and quick sale.
